This is how to create a recurring expense:
- Create a new expense or open an existing one.
- Switch on Recurring.
- Choose Recurrence: weekly/ monthly/ annually.
- Then choose the day/s of week/month or month of the year. Don't forget to press OK at the bottom.
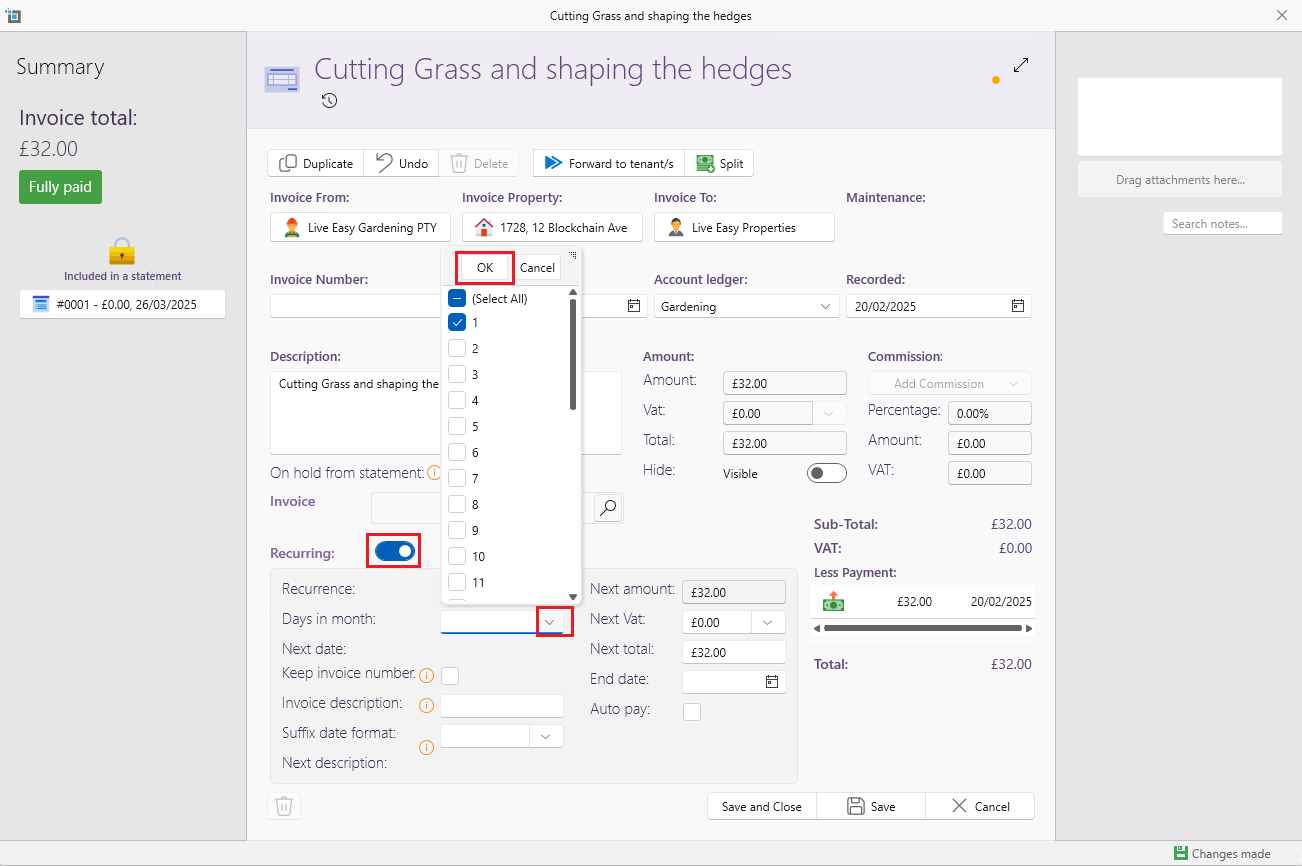
- Once selected you will see the next date an invoice will be created based on this rule.
- Sometimes, like with a mortgage, the first charge will usually be different then the coming charges. Also, you might get notice that a specific recurring charge will increase. In cases like these just change the Next Amount to the next expected charge. This will be used when generating future invoices.
- Some charges, like mortgages and utility bills are being settled via direct debit automatically. You can switch on Auto Pay so SleekTech will create the invoice and the payment. You can also select the bank account this charge is paid from.
- Finally, if you know until when the charge is running you can set an End Date to stop generating invoices from that date.
- If you leave the End Date blank, invoices will be created indefinitely.
- Click Save.
How to include the date in the description:
- Under the Invoice Description field there is a Suffix date format field.
- Click on the dropdown Arrow and a range of different date formats will appear.
- Select a date format then Click Save and Close.

- The next invoice will have the description and date of the recurring expense.

Keep the same invoice number:
If you would like to keep the same invoice number for all recurring invoices, click on Keep invoice number.
You would usually use this where you pay instalments such as an annual council tax bill, split into monthly payments, where the council tax reference number remains consistent across all invoices for the year.

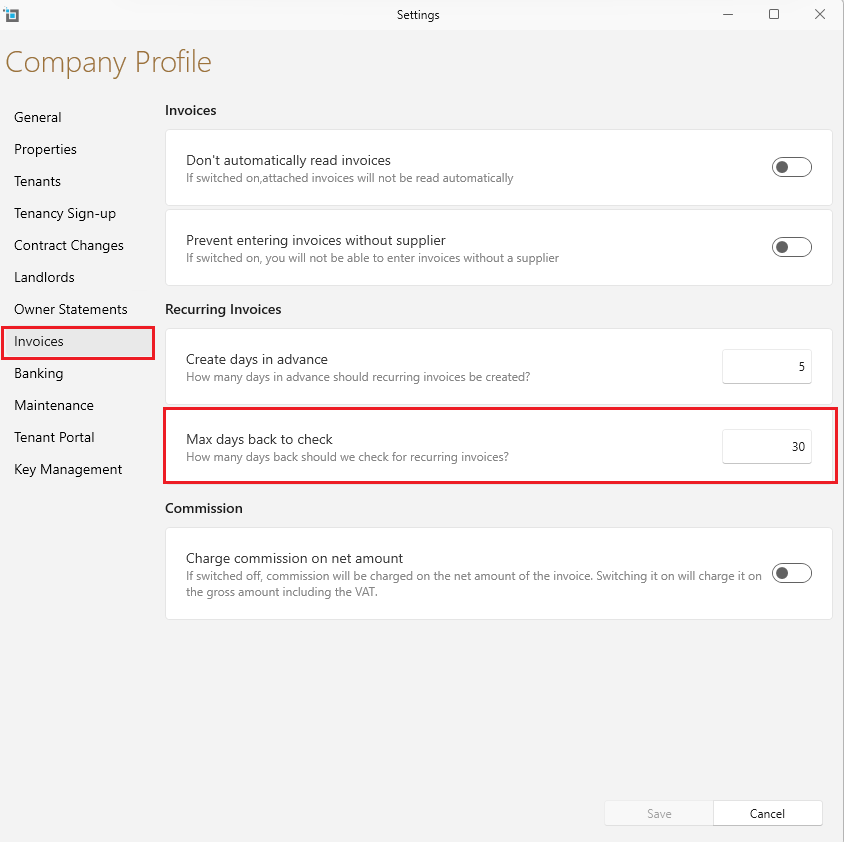
Settings for backtracking recurring expenses:
If you create a new recurring invoice for a charge, the system will by default only pick up and pay any matching payments up to 30 days before the date you created this recurring invoice.
To change the setting to a different amount of days:
- Go to Control panel from the top page ribbon.
- Click on Settings and then on Invoices from the left.
- Under Max days back to check put in the amount of days you desire.
- Please note, the maximum allowed is 365 days back.
- Save and close